kvm虚拟化小结(三)guest安装
KVM guest主机的安装从安装工具上来分,可以使用qemu-kvm(centos系统下是位于/usr/libexec/qemu-kvm位置)工具来安装,也可以使用virt-install工具,不过通常习惯上我们用virt-install工具进行安装;接是否图形安装又可以分为vnc安装和终端命令行安装(该话是针对linux而言的,win系统都是用vnc图形方式安装)。
执行qemu-kvm命令时,会看到如下的提示:
1[root@localhost libvirt]# /usr/libexec/qemu-kvm --help
2QEMU PC emulator version 0.12.1 (qemu-kvm-0.12.1.2), Copyright (c) 2003-2008 Fabrice Bellard
3WARNING: Direct use of qemu-kvm from the command line is not recommended by Red Hat.
4WARNING: Some command line options listed here may not be available in future releases.
5WARNING: Red Hat recommends the use of libvirt as the stable management interface.
所以由上面的提示不难看出,系统还是推荐使用libvirt工具进行安装的。
一、virt-install vnc图形安装
安装之前需要确认开启了vnc支持,vim /etc/libvirt/qemu.conf 打开该配置文件,找到vnc_listen = “0.0.0.0”行,取消该行前的注释。
安装命令如下:
1#virt-install --name ppd_win7 --ram 2048 --disk path=/file/win7.img,size=30 --network network:default --vnc --os-variant ppdwin7 --cdrom /opt/cn_windows_7_professional_with_sp1_x64_dvd_621744.iso
此时可以通过netstat -ntlp查看vnc的端口,默认是从5900开始,也可以通过参数指定vnc的端口和密码,在virt-install 的Graphics Configuration的配置部分,可以看到如下内容:
1Graphics Configuration:
2    --graphics=GRAPHICS
3                        Configure guest display settings. Ex:
4                        --graphics vnc
5                        --graphics spice,port=5901,tlsport=5902
6                        --graphics none
7                        --graphics vnc,password=foobar,port=5910,keymap=ja
连接后的界面如下:

注:这里有可能会连接不上,一般是因为没在iptables上开启相关端口,当然也可以直接关闭防火墙 。个人吐槽一点,感觉vnc并不是很好用,所以一般我的做法是通过vnc完成安装后,再进入系统安装radmin,然后在防火墙上开启radmin的相关端口,通过edit再把vnc关闭。
同理,linux的vnc安装方式一样,只需要把img存放路径、os-variant、源iso文件做下更改即可。
1#virt-install --name ppd_centos --ram 2048 --disk path=/file/centos.img,size=30 --network network:default --graphics vnc,password=test123,port=5910 --os-variant rhel6 --cdrom /opt/centos.iso
二、命令行下的安装(console安装)
具体操作方式如下:
1#virt-install -n ppd_centos -r 1024 --vcpus=1 --os-variant=rhel6 --accelerate --nographics -v -l /opt/CentOS-6.3-x86_64-bin-DVD1.iso -w bridge:br0 --disk path=/file/centos.img,size=30 -x "console=ttyS0"
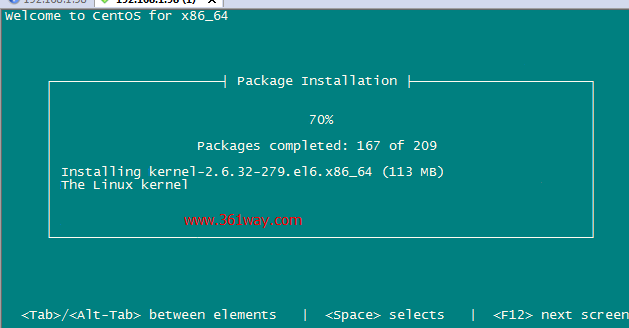
操作过程见下图:
三、无人值守自动化安装(ks安装)
上面提到的第二种安装方式还是需要分区、指定时区、设置密码等操作,是否可以通过直接命令输入后,直接按要求完成操作,而不需要上面的过程 。这个当然也是可以的,可以通过ks的方式进行安装:
1#virt-install --hvm --ram 4089 --vcpus=2 --network=bridge:virbr0 --name=jira_100 --disk /vmsys/jira-100.img,size=130,bus=virtio,cache=none,io='threads' --accelerate --nographics --location=http://192.168.88.253/centos6/6.4/ --extra-args="ks=http://192.168.88.253/ks/jira_100.ks console=tty0 console=ttyS0,115200"
其中88.253为搭建的一台yum源服务器,ks文件的类似如下:
  1# use shadow file encrypted by md5
  2auth  --useshadow  --enablemd5
  3# Install OS instead of upgrade
  4install
  5# boot from MBR (default)
  6bootloader --location=mbr
  7#clear MBR
  8zerombr
  9# delete all partition (default do not delete or use '--none')
 10clearpart --all --initlabel
 11# use text mode instead of graph mode
 12text
 13# enable iptables, allow ssh, separated by ',' if add other ports
 14firewall --enabled --port=22:tcp
 15# install yum resource URL
 16url --url=http://192.168.88.253/centos6/6.4/
 17# disable the settings menu when first boot
 18firstboot --disable
 19keyboard us
 20lang en_US
 21timezone --isUtc Asia/Shanghai
 22# network settings, including DNS, hostname, disable ipv6
 23network --device eth0 --bootproto static --ip 192.168.122.50 --netmask 255.255.255.0 --gateway 192.168.122.1 --nameserver 192.168.122.1 --hostname webapp-50.361way.com --noipv6
 24# syslog level, use '--host' and '--port' to define remote rsyslog server
 25logging --level=info
 26# reboot after installation (default), may use 'poweroff' to shutdown system
 27reboot
 28# set root password, use '--iscrypted' to use crypt password
 29rootpw 123456
 30# disable selinux
 31selinux --disable
 32# do not configure X Windows
 33skipx
 34# partition, vda is the first disk of system, size is counted by MB
 35part /boot --fstype="ext4" --ondisk=vda --size=512
 36# use '--recommended' to let system decide the size of swap partition
 37part swap --fstype="swap" --ondisk=vda --recommended
 38part /data1 --fstype="ext4" --ondisk=vda --size=15360
 39part /logs --fstype="ext4" --ondisk=vda --size=51200
 40part / --bytes-per-inode=4096 --fstype="ext4" --ondisk=vda --grow --size=1
 41# use '--grow --size=1' to use all the disk size left
 42#part /var --fstype="ext4" --ondisk=vda --grow --size=1
 43# add additional repositories
 44repo --name="extra" --baseurl=http://192.168.88.253/centos6/extra
 45# install packages needed, default will install @core and @base, use '--nobase' to do not install @base
 46%packages
 47@core
 48@base
 49man
 50telnet
 51ntpdate
 52#nagios-plugins
 53#nagios-plugins-all
 54#nrpe
 55#gcc
 56#make
 57net-snmp
 58net-snmp-utils
 59#watchdog
 60# shell to run after installation, configure DNS, yum repository, chkconfig,
 61%post
 62(
 63echo 'nameserver 8.8.8.8
 64nameserver 8.8.4.4' >> /etc/resolv.conf
 65mv /etc/yum.repos.d/CentOS-Base.repo /etc/yum.repos.d/CentOS-Base.repo.b
 66echo '[base]
 67name=centos6
 68baseurl=http://192.168.88.253/centos6/6.4
 69gpgcheck=0
 70[extra]
 71name=centos-extra
 72baseurl=http://192.168.88.253/centos6/extra
 73gpgcheck=0' > /etc/yum.repos.d/CentOS-Base.repo
 74echo 'IPV6INIT=no' >> /etc/sysconfig/network
 75for Service in postfix lvm2-monitor netfs kdump;
 76do
 77chkconfig $Service off
 78done
 79echo 'sshd:ALL' >> /etc/hosts.allow
 80echo 'ALL:ALL' >> /etc/hosts.deny
 81sed -i '/HWCLOCK/{s/no/yes/g}' /etc/sysconfig/ntpdate
 82sed -i '/DNS/{s/#//g;s/yes/no/g}' /etc/ssh/sshd_config
 83# disable root ssh login
 84#sed -i '/PermitRootLogin/d' /etc/ssh/sshd_config
 85#echo "PermitRootLogin no" >> /etc/ssh/sshd_config
 86#chroot for ssh
 87#echo "session    required    pam_chroot.so" >> /etc/pam.d/sshd
 88#echo "tyj    /home/tyj" >> /etc/security/chroot.conf
 89#only user in wheel group can use "su"
 90#sed -i '/required/{s/#//g}' /etc/pam.d/su
 91#limit of open files and processes for each user
 92cat >> /etc/security/limits.conf <<EOF
 93*               soft    nofile  10240
 94*               hard    nofile  10240
 95root            soft    nproc   65535
 96root            hard    nproc   65535
 97EOF
 98# snmpd configuration
 99#sed -i '/^com2sec/{s/public/mycompany/g}' /etc/snmp/snmpd.conf
100#sed -i '/^access/{s/systemview/all/g}' /etc/snmp/snmpd.conf
101#sed -i '/80$/{s/#//g}' /etc/snmp/snmpd.conf
102#chkconfig snmpd on
103#echo 'snmpd:192.168.' >> /etc/hosts.allow
104# log timestamp in command history
105echo "export HISTTIMEFORMAT='%F %T '" >> /etc/profile
106#logout after 3600s if no action
107echo "export TMOUT=3600" >>/etc/profile
108# enable the fuction of watchdog
109#echo "modprobe softdog" >> /etc/sysconfig/watchdog
110#sed -i '/min-memory/{s/#//}' /etc/watchdog.conf
111#sed -i '/watchdog-device/{s/#//}' /etc/watchdog.conf
112#sed -i '/admin/{s/#//}' /etc/watchdog.conf
113#sed -i '/interval/{s/#//}' /etc/watchdog.conf
114#sed -i '/logtick/{s/#//}'/etc/watchdog.conf
115#sed -i '/pidfile/{s/#//}' /etc/watchdog.conf
116#chkconfig watchdog on
117# configure nagios client
118#sed -i '/server_address/{s/#//g;s/127.0.0.1/'192.168.x.x'/g}' /etc/nagios/nrpe.cfg
119#sed -i '/allowed_hosts/{s/127.0.0.1/&,192.168.x.x /}' /etc/nagios/nrpe.cfg
120#chkconfig nrpe on
121echo '' >> /etc/rc.local
122) 1>/root/install.log 2>&1
具体也可以视情况更改以上ks文件的内容,安装的时候系统会根据ks文件的内容自动完成安装操作的。
捐赠本站(Donate)
 如您感觉文章有用,可扫码捐赠本站!(If the article useful, you can scan the QR code to donate))
- Author: shisekong
- Link: https://blog.361way.com/kvm-guest-install/3162.html
- License: This work is under a 知识共享署名-非商业性使用-禁止演绎 4.0 国际许可协议. Kindly fulfill the requirements of the aforementioned License when adapting or creating a derivative of this work.