RH134之kickstart自动化安装
由于线上化环境不太便于演示kickstart的自动化安装,同时红帽本身的课程对这里讲的比较浅,这里我就以centos8为例,使用vmware环境演示下kickstart的安装。这里是在CentOS 8上实现PXE自动化安装CentOS 7,8 。
1、安装相关软件包并启动
需要安装的软件包dhcp-server tftp-server httpd syslinux-nonlinux(或者syslinux-tftpboot),这里httpd也可以换成vsftp或者nfs。
1[root@centos8 ~]# yum -y install dhcp-server tftp-server httpd syslinux-nonlinux
2[root@centos8 ~]# systemctl enable --now httpd tftp dhcpd
注意这里enable的时候会报错,因为上面的服务有些还没给出配置。
2、配置DHCP服务
 1[root@centos8 ~]# cp /usr/share/doc/dhcp-server/dhcpd.conf.example /etc/dhcp/dhcpd.conf
 2[root@centos8 ~]# vim /etc/dhcp/dhcpd.conf
 3option domain-name-servers 223.5.5.5,114.114.114.114;
 4default-lease-time 86400;
 5max-lease-time 106400;
 6subnet 192.168.159.0 netmask 255.255.255.0 {
 7  range 192.168.159.10 192.168.159.20;
 8  option routers 192.168.159.2;
 9  next-server 192.168.159.138;
10  filename "pxelinux.0";
11}
12[root@centos8 ~]# systemctl enable --now dhcpd
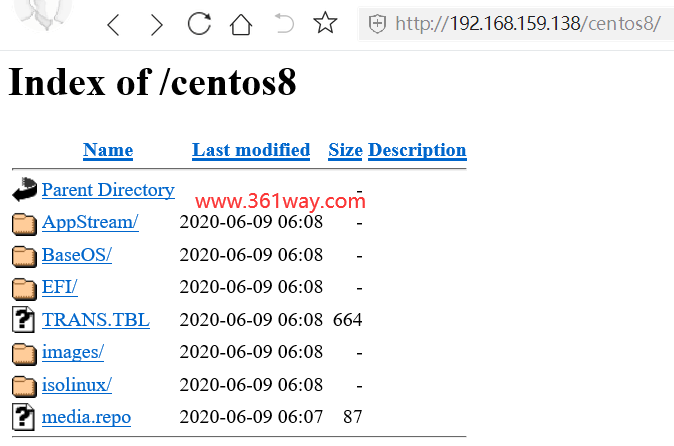
3、准备yum源和相关目录
创建相关目录,并把iso文件挂载到相应目录上,如果长期使用,可以把目录里的内容复制到对应的目录里。
1[root@centos8 ~]# mkdir -pv /var/www/html/centos{7,8}
2[root@centos8 ~]# scandisk
3[root@centos8 ~]# lsblk
4[root@centos8 ~]# mount /dev/sr1 /var/www/html/centos7
5[root@centos8 ~]# mount /dev/sr0 /var/www/html/centos8
4、准备kickstart文件
centos8 kickstart文件内容如下:
 1[root@centos8 ~]# mkdir /var/www/html/ks/
 2[root@centos8 ~]# cp anaconda-ks.cfg /var/www/html/ks/centos8.cfg
 3[root@centos8 ~]# vim /var/www/html/ks/centos8.cfg   //编辑并修改
 4[root@centos8 ks]# cat centos8.cfg
 5ignoredisk --only-use=sda
 6zerombr
 7text
 8reboot
 9clearpart --all --initlabel
10selinux --disabled
11firewall --disabled
12url --url=http://192.168.159.138/centos8/
13keyboard --vckeymap=us --xlayouts='us'
14lang en_US.UTF-8
15network --bootproto=dhcp --device=eth0 --ipv6=auto --activate
16bootloader --append="net.ifnames=0" --location=mbr --boot-drive=sda
17network --hostname=www.361way.com
18rootpw --iscrypted $6$94K7xMjQMHGPN9Na$ifLpeg2bnNX1BzesXrUoQNupaIIKdjuaLKgu5n4yrGHlfNhZWySEePTB8Nn9tTDZcm5mB4MpS5S0Hb7UPqoeF.
19firstboot --enable
20skipx
21services --disabled="chronyd"
22timezone Asia/Shanghai --isUtc --nontp
23#autopart --type=lvm
24#part / --fstype xfs --size 1 --grow --ondisk sda
25part / --fstype="xfs" --ondisk=sda --size=102400
26part /data --fstype="xfs" --ondisk=sda --size=51200
27part swap --fstype="swap" --ondisk=sda --size=2048
28part /boot --fstype="ext4" --ondisk=sda --size=1024
29%packages
30@^minimal-environment
31kexec-tools
32%end
33%addon com_redhat_kdump --enable --reserve-mb='auto'
34%end
35%anaconda
36pwpolicy root --minlen=6 --minquality=1 --notstrict --nochanges --notempty
37pwpolicy user --minlen=6 --minquality=1 --notstrict --nochanges --emptyok
38pwpolicy luks --minlen=6 --minquality=1 --notstrict --nochanges --notempty
39%end
40[root@centos8 ks]#
centos7 ks文件内容如下:
 1[root@centos8 ~]# vi /var/www/html/ks/centos7.cfg
 2[root@centos8 ks]# cat centos7.cfg
 3install
 4xconfig ?--startxonboot
 5keyboard --vckeymap=us --xlayouts='us'
 6url --url="http://192.168.159.138/centos7/"
 7lang en_US
 8text
 9firstboot --enable
10selinux --disabled
11skipx
12services --disabled="chronyd"
13ignoredisk --only-use=sda
14firewall --disabled
15network --bootproto=dhcp --device=eth0 --ipv6=auto --activate
16bootloader --append="net.ifnames=0" --location=mbr --boot-drive=sda
17network --hostname=www.361way.com
18rootpw --iscrypted $6$94K7xMjQMHGPN9Na$ifLpeg2bnNX1BzesXrUoQNupaIIKdjuaLKgu5n4yrGHlfNhZWySEePTB8Nn9tTDZcm5mB4MpS5S0Hb7UPqoeF.
19reboot
20timezone Asia/Shanghai --nontp
21zerombr
22#autopart --type=lvm
23clearpart --all --initlabel
24part swap --fstype="swap" --ondisk=sda --size=3072
25part / --fstype="xfs" --ondisk=sda --size=51200
26part /boot --fstype="xfs" --ondisk=sda --size=1024
27part /data --fstype="xfs" --ondisk=sda --size=30720
28%post
29echo "wwww.361way.com" >>/root/install.txt
30%end
31%packages
32@core
33%end
修改下权限,保证通过http服务可以正常访问对应的ks文件内容:
1[root@centos8 ~]# cd /var/www/html/ks/
2[root@centos8 ks]# ls
3centos7.cfg  centos8.cfg
4[root@centos8 ks]# chmod 644 *
5、准备PXE启动相关文件
 1#准备centos7,8各自的内核相关文件
 2[root@centos8 ~]# mkdir /var/lib/tftpboot/centos{7,8}
 3[root@centos8 ~]# cp /var/www/html/centos7/isolinux/{vmlinuz,initrd.img} /var/lib/tftpboot/centos7
 4[root@centos8 ~]# cp /var/www/html/centos8/isolinux/{vmlinuz,initrd.img} /var/lib/tftpboot/centos8
 5[root@centos8 ~]# cp /usr/share/syslinux/{pxelinux.0,menu.c32} /var/lib/tftpboot/
 6#以下三个文件是centos8安装所必须文件,centos6,7则不需要
 7[root@centos8 ~]# cp /var/www/html/centos8/isolinux/{ldlinux.c32,libcom32.c32,libutil.c32} /var/lib/tftpboot/
 8#生成安装菜单文件
 9[root@centos8 ~]# mkdir /var/lib/tftpboot/pxelinux.cfg/
10[root@centos8 ~]# cp /var/www/html/centos8/isolinux/isolinux.cfg /var/lib/tftpboot/pxelinux.cfg/default
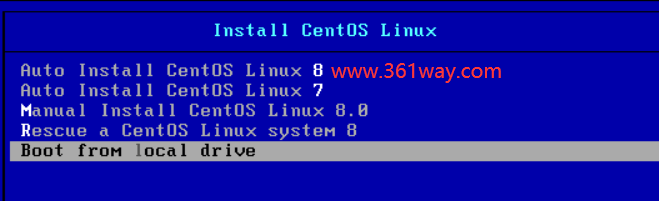
6、准备启动菜单文件
 1[root@centos8 ~]# cat /var/lib/tftpboot/pxelinux.cfg/default
 2default menu.c32
 3timeout 600
 4menu title Install CentOS Linux
 5label linux8
 6menu label Auto Install CentOS Linux ^8
 7kernel centos8/vmlinuz
 8append initrd=centos8/initrd.img ks=http://192.168.159.138/ks/centos8.cfg
 9
10label linux7
11menu label Auto Install CentOS Linux ^7
12kernel centos7/vmlinuz
13append initrd=centos7/initrd.img ks=http://192.168.159.138/ks/centos7.cfg
14
15label manual
16menu label ^Manual Install CentOS Linux 8.0
17kernel centos8/vmlinuz
18append initrd=centos8/initrd.img
19inst.repo=http://192.168.159.138/centos8/
20label rescue
21menu label ^Rescue a CentOS Linux system 8
22kernel centos8/vmlinuz
23append initrd=centos8/initrd.img
24inst.repo=http://192.168.159.138/centos8/ rescue
25
26label local
27menu default
28menu label Boot from ^local drive
29localboot 0xffff
30[root@centos8 ~]#
7、安装测试
捐赠本站(Donate)
 如您感觉文章有用,可扫码捐赠本站!(If the article useful, you can scan the QR code to donate))
- Author: shisekong
- Link: https://blog.361way.com/rhel8-ks-install/6571.html
- License: This work is under a 知识共享署名-非商业性使用-禁止演绎 4.0 国际许可协议. Kindly fulfill the requirements of the aforementioned License when adapting or creating a derivative of this work.