RH134小结(七)nmcli配置链路聚合
本篇本属于rh254的内容,不过刚好提到了nmcli ,这里也把链路聚合也放在一起记录下。centos6/rhel6 默认的链路聚合使用的是bond ---可以参看我之前的博文linux bonding配置 。在centos7/redhat7中虽然依旧保留的有bonding内核模块(bond功能对应的模块是bonding),同样也可以使用bond模块配置链路聚合,不过默认情况下NetworkManager程序中集成了teamd功能就来配置链路聚合。
一、实验目的
我主机上有两块网卡eth1和eth2,将这两块链路聚合配置为active-backup主备模式,IP地址为172.16.1.100/255.255.255.0 。
二、teamed的配置
1、nmcli-examples
由于nmcli 下的命令都比较长,所以我们不用死记,新版里的帮助和命令参数的tab补全特别好用,可以帮助我们搞定记不住的东西。首先man nmcli-examples查看
1# man nmcli-examples
2Example 6. Adding a bonding master and two slave connection profiles
3    $ nmcli con add type bond ifname mybond0 mode active-backup
4    $ nmcli con add type bond-slave ifname eth1 master mybond0
5    $ nmcli con add type bond-slave ifname eth2 master mybond0
6Example 7. Adding a team master and two slave connection profiles
7    $ nmcli con add type team con-name Team1 ifname Team1 config team1-master-json.conf
8    $ nmcli con add type team-slave con-name Team1-slave1 ifname em1 master Team1
9    $ nmcli con add type team-slave con-name Team1-slave2 ifname em2 master Team1
我这里只选取了example 6和example 7两个样例的内容,其中例6是bond的配置、例7是team 的配置方法。本篇我们讲到的是teamd ,所以这里看例7 。
2、teamd.conf
查看teamd.conf的man手册时注意:由于有man teamd ,也有man teamd.conf 。其中一个是命令的帮助,一个是配置文件的帮助。不要搞混了,我们查看的是配置文件的。
 1# man teamd.conf
 2EXAMPLES
 3       {
 4         "device": "team0",
 5         "runner": {"name": "roundrobin"},
 6         "ports": {"eth1": {}, "eth2": {}}
 7       }
 8       Very basic configuration.
 9       {
10         "device": "team0",
11         "runner": {"name": "activebackup"},
12         "link_watch": {"name": "ethtool"},
13         "ports": {
14           "eth1": {
15             "prio": -10,
16             "sticky": true
17           },
18           "eth2": {
19             "prio": 100
20           }
21         }
22       }
在examples 项我们可以找到上面的部分,我们只取runner 的值,其他部分我们不需要。
3、teamed的配置
1# nmcli con add type team con-name team1 ifname team1 config '{"runner": {"name":"activebackup"}}'
2# nmcli con add type team-slave con-name Team1-slave1 ifname eth1 master Team1
3# nmcli con add type team-slave con-name Team1-slave2 ifname eth2 master Team1
为Team1接口配置IP地址
1# nmcli connection modify team0 ipv4.addresses "172.16.1.100/24"  ipv4.method manual
2需要配置网关和DNS时,可以修改为下面的配置
3# nmcli connection modify team0 ipv4.addresses "172.16.1.100/24 172.16.1.1"  ipv4.dns "114.114.114.114 8.8.8.8"  ipv4.method manual
4、启用Team1节口
1# nmcli connection up
5、查看验证
 1# teamdctl team1 state
 2setup:
 3  runner: activebackup
 4ports:
 5  eth1
 6    link watches:
 7      link summary: up
 8      instance[link_watch_0]:
 9        name: ethtool
10        link: up
11  eth2
12    link watches:
13      link summary: up
14      instance[link_watch_0]:
15        name: ethtool
16        link: up
17runner:
18  active port: eth1
teamnl查看验证
 1# teamnl team1 ports
 2 4: eth1: up 1000Mbit FD
 3 3: eth2: up 1000Mbit FD
 4# teamnl team1 options
 5 queue_id (port:eth2) 0
 6 priority (port:eth2) 0
 7 user_linkup_enabled (port:eth2) false
 8 user_linkup (port:eth2) true
 9 enabled (port:eth2) true
10 queue_id (port:eth1) 0
11 priority (port:eth1) 0
12 user_linkup_enabled (port:eth1) false
13 user_linkup (port:eth1) true
14 enabled (port:eth1) true
15 mcast_rejoin_interval 0
16 mcast_rejoin_count 0
17 notify_peers_interval 0
18 notify_peers_count 0
19 mode activebackup
20
21禁用一块网卡:
22# nmcli device disconnect eth2
23显示当前活动的网口
24# teamnl team1 getoption activeport
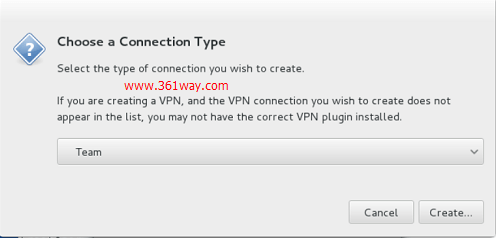
注意,查看活动的网口时,返回的是数字。该数字和teamnl team1 ports前查到的数字对应。不过感觉命令操作麻烦的,也可以通过nmtui 或 nm-connection-editor 工具进行图形配置,如下:

捐赠本站(Donate)
 如您感觉文章有用,可扫码捐赠本站!(If the article useful, you can scan the QR code to donate))
- Author: shisekong
- Link: https://blog.361way.com/nmcli-bond-teamd/4837.html
- License: This work is under a 知识共享署名-非商业性使用-禁止演绎 4.0 国际许可协议. Kindly fulfill the requirements of the aforementioned License when adapting or creating a derivative of this work.